Today, I went down to the south part of the Wild Pacific Trail, where the Amphitrite Lighthouse is situated, to continue my experiments on whether I can get good B&W images right out of my cameras. My methodology was to set the camera (NEX 7) to capture RAW plus a JPEG file, setting the exposure to avoid blowing out the highlights (blown highlights are unrecoverable). I then simply resized the JPEG files to 1200 x 800 pixels, but processed the RAW files to yield the best results for a B&W final image.
Here is an example that shows how the camera captured the B&W JPEG file (this is straight from the camera, only resized):

As you can see, the image is essentially exposed for the sky, and consequently, the shadow areas (which comprise a good portion of the image) lack much significant details. So, back to my normal post processing, which entails minor adjustments in Adobe Camera RAW to ensure a good histogram spread from dark to light. I then open it into Nik Color Efex Pro 4, where I have created a custom recipe that includes the following filters:
- Graduated Neutral Density (as needed to darken skies / lighten foreground etc)
- Detail Extractor (if not overdone, this lends a nice level of shadow detail)
- Polarization (enriches colors, which translate to an increased tone palette in B&W)
- Pro Contrast (added contrast helps definition)
Here's what the colour image looks like after this process:

Next, this processed image is opened in Nik Silver Efex Pro 2 for the final conversion to B&W. Again, I have created a custom preset that I use to yield a rich result that closely emulates a selenium print of which I am very fond:
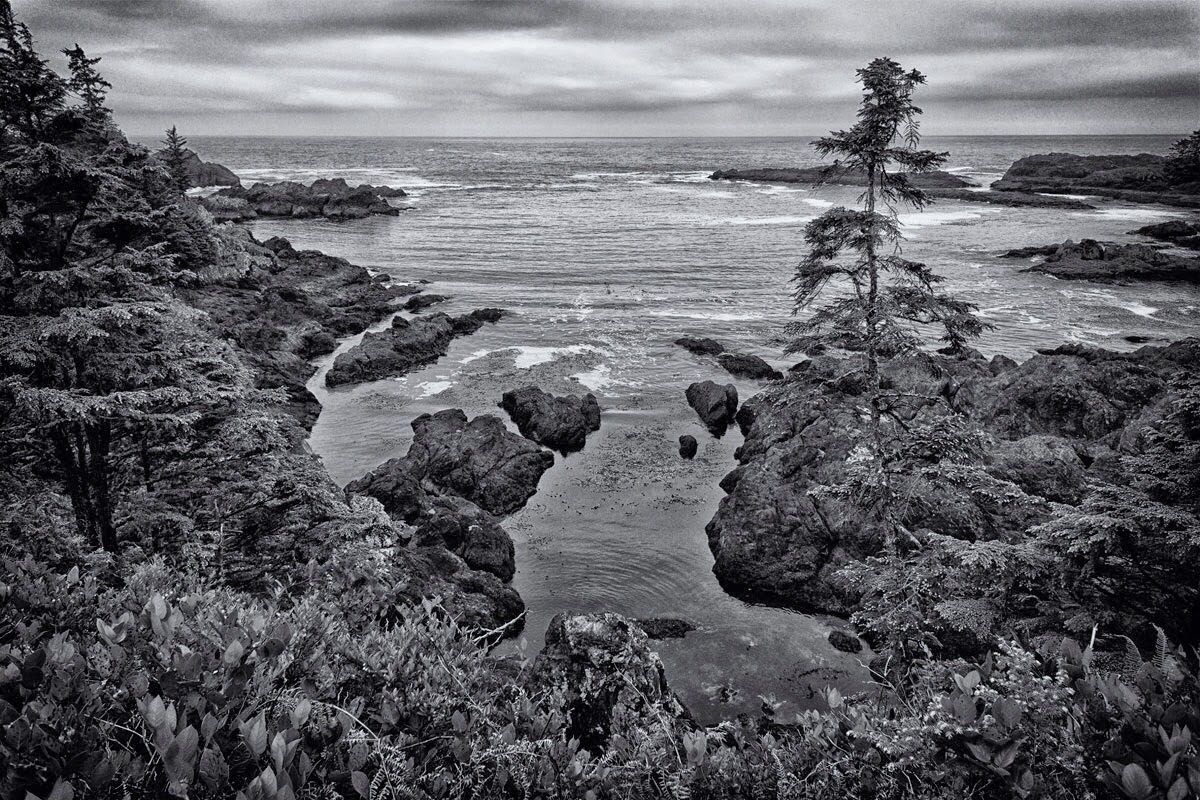
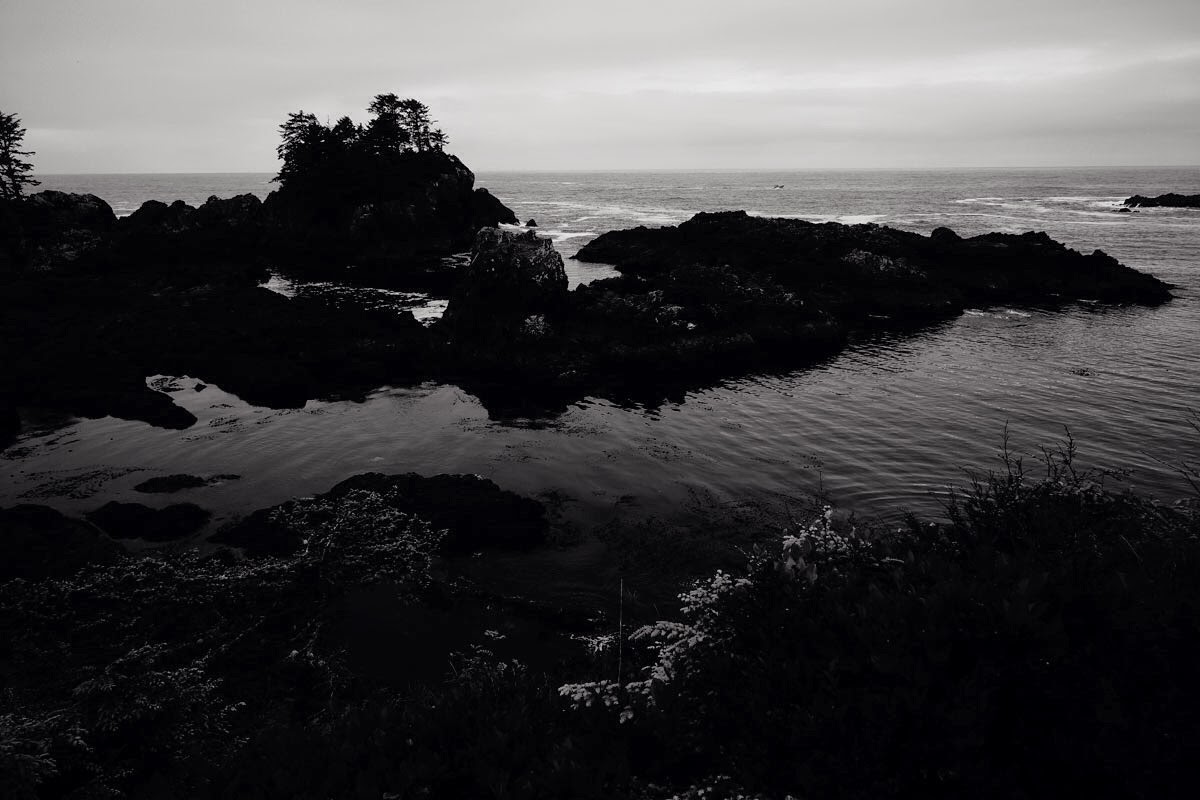
Here are some other examples showing first the out-of-camera JPEG, followed by the post-processed result:

As you can see, this shows quite a difference!


This example shows a less striking change, but certainly it is an improvement.
Some images, and it all depends on the overall exposure, actually do quite well as out-of-camera JPEGS... Here's an example:

I guess the bottom line for me is that I'll continue to shoot RAW and post process my B&W images. Sure it take longer, but the results are certainly worth it. And actually, for those of us who grew up in the wet darkroom, this is where a lot of the magic takes place. Only now, without the chemicals and the smell.
Ciao, for now!
No comments :
Post a Comment